Enabling the Loop feature in PowerPoint is a great way of keeping your audience engaged throughout your presentation. A looping presentation in PowerPoint refers to a slideshow that plays from start to finish and then restarts automatically. Instead of clicking through each slide, the presentation continues independently, requiring minimal attention to follow.
In this blog post, you’ll learn how to loop a PowerPoint presentation step-by-step. We’ll also cover the benefits of creating loops in slides and discuss use cases where a loop PPT presentation can enhance your message delivery.
Why and When to Loop PPT Presentations
Looping a slideshow on PowerPoint is more than just a handy trick—it’s a way to keep your message consistent and hands-free. You can attend to other tasks and let your slideshow do the work. You save time, reduce stress, and improve the quality of your presentation.
There are plenty of real-world situations where a PowerPoint continuous loop comes in handy:
- Office lobbies: You can display company news, welcome messages, or advertisements to visitors in waiting rooms.
- Trade shows: You can also loop your presentations to attract passersby at exhibitions and trade shows.
- Retail kiosks: Several businesses display products and promotions without staff.
- Classrooms and training sessions: Tutors and trainers can use looping slides to improve lessons.
You’ll find looped PowerPoint slides particularly helpful whenever you need your presentation to run independently.
How to Loop a PowerPoint Presentation in 3 Ways
There are different ways to set up a loop presentation in PowerPoint. Depending on your need, you can loop the entire slideshow, focus on specific slides, or use timings and transitions so everything runs without your intervention.
1. Make the PowerPoint Loop Slideshow Continuously
The most common method to loop PowerPoint is to set your presentation to loop all slides from start to finish. You should opt for this when displaying at trade shows, conferences, or cases where you want your slides to play repeatedly.
📝 To make your PowerPoint slideshow loop continuously:
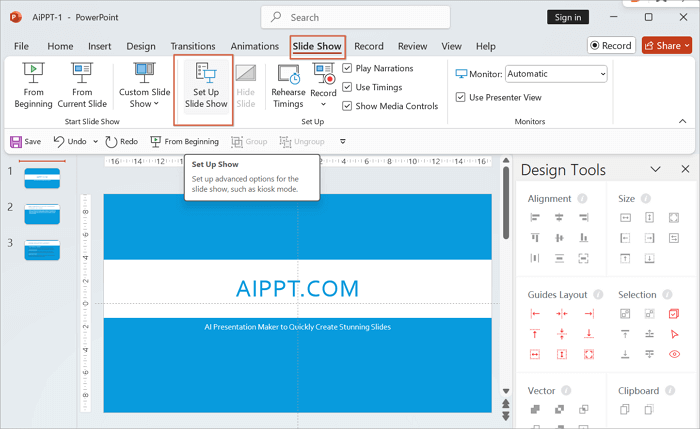
Step 1: Open your PowerPoint file and go to “Slide Show > Set Up Slide Show”.
Step 2: In the dialogue box that pops up, check Loop continuously until ‘Esc’ from the “Show Options”.
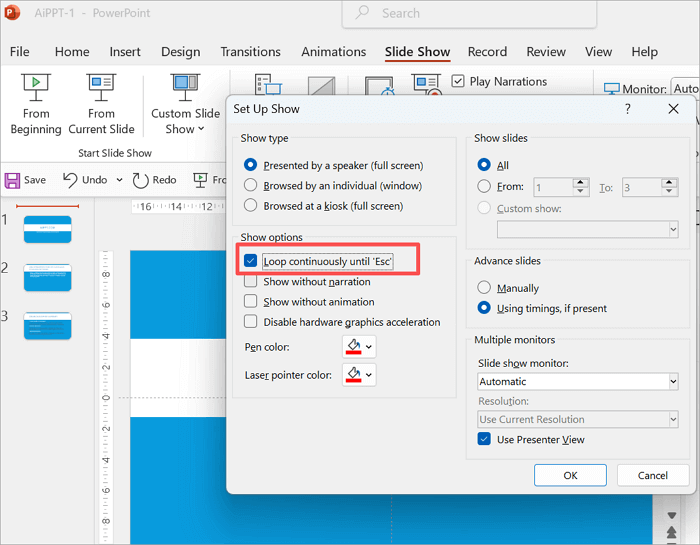
Step 3: Select OK to save the setting.
2. Set PowerPoint on a Loop of Specific Slides
If you prefer selecting certain slides instead of having the whole deck on repeat, this is for you. This one will be helpful when you need to showcase product demo slides or a few key slides during a break at a workshop.
📝 To set up a looping presentation PowerPoint on specific slides:
Step 1: Proceed to the “Slide Show > Set Up Slide Show” tab again.
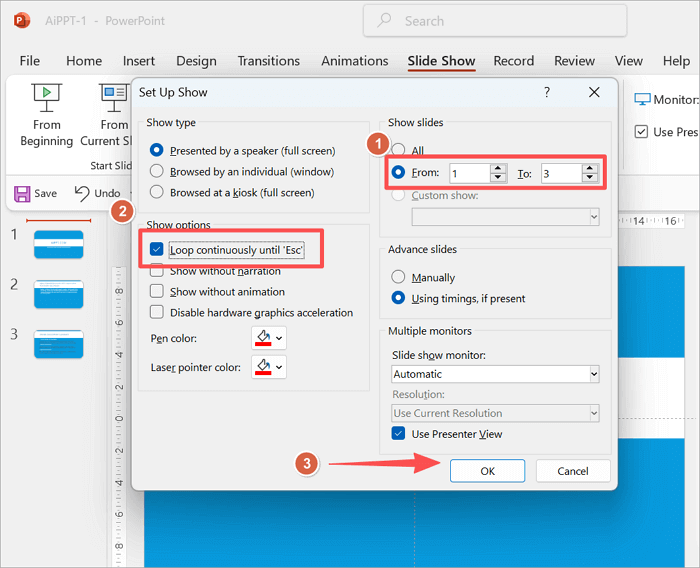
Step 2: Under Show Slides, enter the range of slides you want.
Step 3: Check Loop continuously until ‘Esc’.
Step 4: Select OK to save the setting.
With this method, you have more control than a full slideshow loop, because you choose which slide repeats and which skips.
3. Loop Slides in PowerPoint Using Timing and Transitions
What if I told you that you could further customize the loop in PPT and select how much time you want your slides to play for? This way, your slides advance automatically after the duration you set.
You can use auto-playing slides in waiting rooms, conferences, exhibitions, trade shows, and other self-running presentations, to mention a few.
📝 To use timing and transitions in your PowerPoint slides:
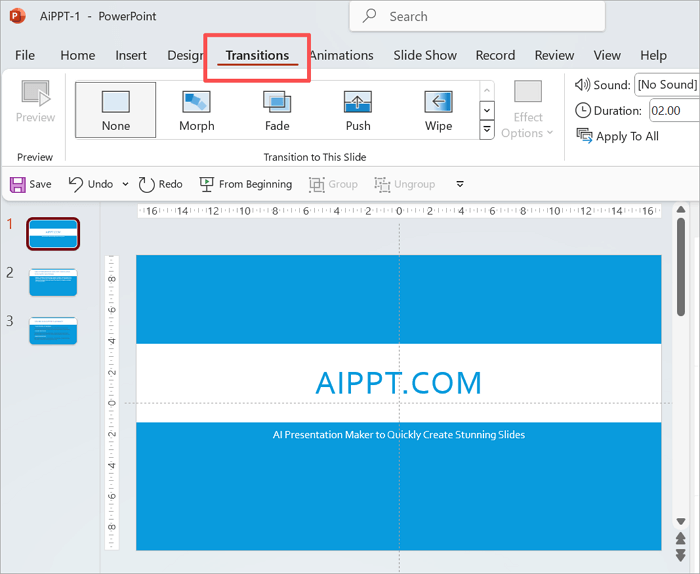
Step 1: Select a slide and proceed to the Transitions tab.
Step 2: Proceed to the Timing section and uncheck the “On Mouse Click” box. Then, enter how many seconds you want the slide to appear.
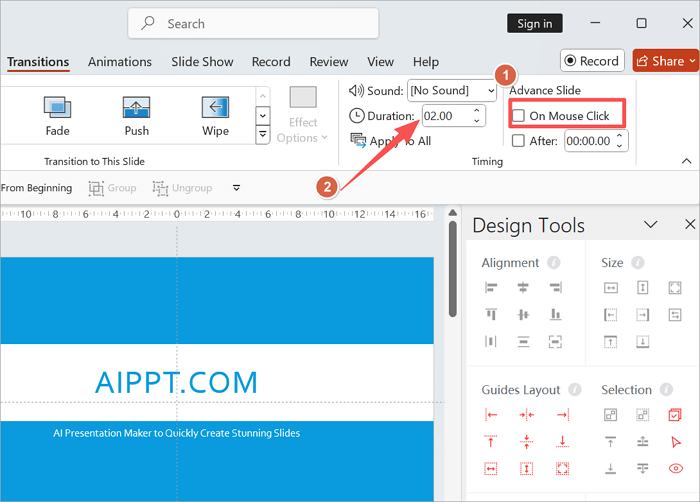
Step 3: Click “Apply To All” if you want to use the same timing across the presentation.
Step 4: Click Loop continuously until ‘Esc’ under “Set Up Slide Show”, to enable continuous loop.
And that’s it! Your loop PowerPoint slides will run as a show, based on the timings you’ve set.
Bonus: Make an Impressive Presentation with AI
Knowing how to loop a PowerPoint presentation is one step towards freedom. Yes, it removes the burden of clicking through slides during a presentation, but what if it could get even better?
Creating a professional presentation takes time, from planning your outline to designing attractive slides. That’s where AiPPT comes in. This is the most suitable AI tool to generate a PowerPoint quickly and effectively.
Here are some key benefits of AiPPT.com:
💡 Smart outline and content generation: Input the topic or theme of the presentation you want to make, and then you will get an AI-generated PPT outline and content.
📥 Flexible input options: You can type how you want your presentation to be, upload a document in any format, or share a URL to generate a PPT.
📚 Extensive template library: Featuring over 200,000 professionally designed PPT templates, AiPPT has what it takes to make your presentation stand out.
To generate an AI-powered slideshow using AiPPT:
Step 1: Visit AiPPT and sign up or sign in and click on the “+ New Project”.

Step 2: Choose from the options available to create your PPT. Then enter a prompt to generate.

Step 3: Review the outline and click on “Select template”.
Step 4: Choose your preferred template and click “Generate PPT”.
Step 5: After generating your PPT, you can use the “Edit” and “Download” buttons to customize and save your project, respectively.

And that’s it! You get your slides in seconds to minutes, depending on how much you generate. You can also use the presentation you generate with AiPPT to create loop PowerPoint slides.
Conclusion
Knowing how to loop a PowerPoint presentation is a great skill, and you’ll find it helpful now and then. Whether you loop all slides, specific sections, or use timed transitions, PowerPoint makes it simple to keep your message playing on repeat. And you can combine the different loop techniques with tools like AiPPT to design slides even faster.
FAQs on Looping Presentation PowerPoint
Before you go, here are answers to some questions you may have about keeping your PowerPoint on a loop:
1. How to loop a slideshow on PowerPoint online?
As you might know, the online version of Microsoft PowerPoint has limited controls compared to the desktop version, which also impacts the looping features.
To loop a slideshow on PowerPoint online:
- Select the slide and proceed to the “Transitions” tab.
- Assign timing to each slide
- Once the slideshow ends, you can manually restart it by pressing “F5”.
2. How to loop PowerPoint slides without clicking?
You can use automatic transitions if you want your presentation to play without using the mouse or keyboard. Follow these steps to do this:
- Select a slide.
- Proceed to the “Transitions” tab.
- Go to “Timing” and turn off Mouse Click.
- Then, set a specific duration for each slide.
When applied across the presentation, your slides will advance automatically.
3. How to make a PPT loop continuously?
It’s easy to create a continuous loop with the built-in slideshow settings in Microsoft PowerPoint. Here is how to do that:
- Open your presentation.
- Go to “Slide Show > Set Up Slide Show”.
- Next, check the “Loop continuously until Esc” box.
To stop the loop, press the Esc key.